Issue: You would like to setup a third-party SSL certificate on your Ironport Email Security Appliance to facilitate IronPort TLS encryption of messages and HTTPS encryption for IronPort quarantine and admin pages.
Background: The IronPort does include a self-signed certificate, however a self-signed cert is not generated by a Certificate Authority recognized by mail servers and web browsers.
You will need to buy an SSL certificate from a recognized third party certificate authority like GoDaddy(25%OFF), or checkout my guide on buying a cheap ssl certificate to get the best deal on an IronPort SSL certificate.
Solution Walkthrough: Request and install an SSL Certificate from a Recognized third-party Cert Provider
First check the currently installed certificates by clicking Network > Certificates:
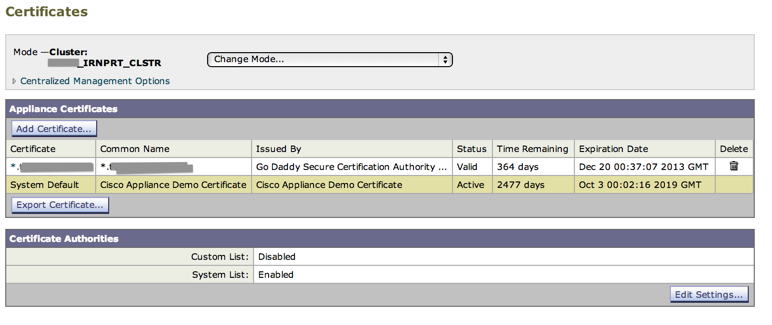
**Before making any changes, go ahead and backup the ironport configuration under “System Administration”
- If you do not have a third-party SSL Certificate yet, then start below at Step #1.
- If you already have a certificate from a third-party Certificate Authority (like GoDaddy), then you can skip to step #3. HOWEVER, the cert file you have must be just right, here are instructions for properly exporting your existing certificate from IIS.
1) Create Certificate Request: click Network > Certificates > Add Certificate
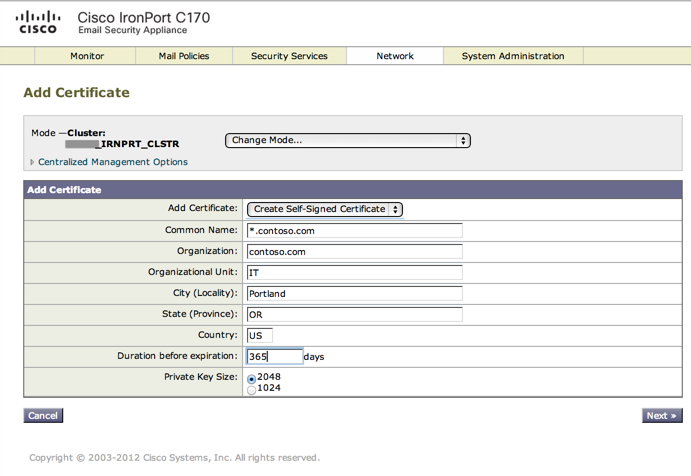
Fill out the details for the certificate that you want to request from the third party CA. This should match the type of cert (credit) that you purchased. In this case I am going to request a wildcard certificate “*.contoso.com”. For a single cert, you could use something like “spamfilter.contoso.com”. Click Next.
2) Download certificate request from Ironport:
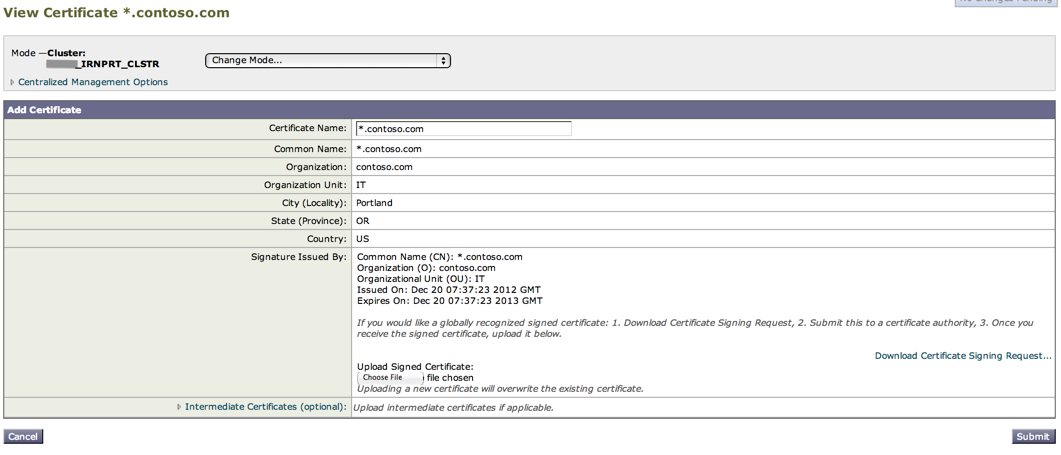
- On the next screen you will see confirmation details on the certificate that you added.
- Click “Download Certificate Signing Request” to download the CSR
- Upload the CSR to your Certificate Authority, if you haven’t purchased a certificate yet here is a quick guide to cheap ssl certificates.
3) Installing the certificate you received from the Certificate Authority (GoDaddy, NameChea, Etc):
- Obtain the SSL certificate issued from your CA (GoDaddy, NameCheap, etc)
- Per screenshot above, click the “Choose File” button below “Upload Signed Certificate” in order to upload the certificate from your Certificate Authority (GoDaddy) to the IronPort appliance.
- Expand the “Intermediate Certificate (Optional)” area to upload any Intermediate Certificates required by your certificate authority
- Click Submit
At this point your new cert is now installed, but it will not yet be used at this point. The next step is to activate the certificate on the IronPort.