If you need multiple people to receive the email sent to a single address, a Distribution Group is the proper choice. This easy to follow guide will walk through the process to create a Distribution Group in Office 365.
0) confirm the email address you plan on using for the Distribution Group is not already applied to an acct in AD.
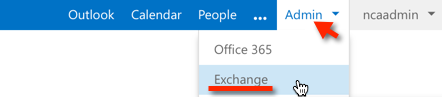
1) logon to portal.microsoftonline.com
2) Click the ‘Admin’ drop down and select ‘Exchange’
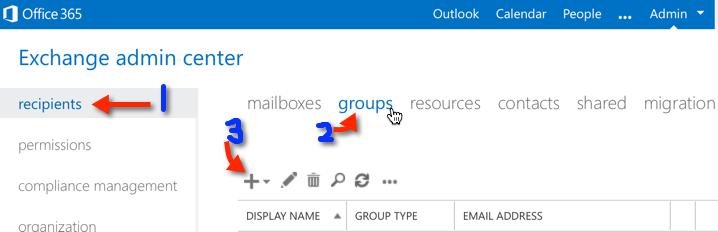
Click Recipients > groups > click the ‘+’ button
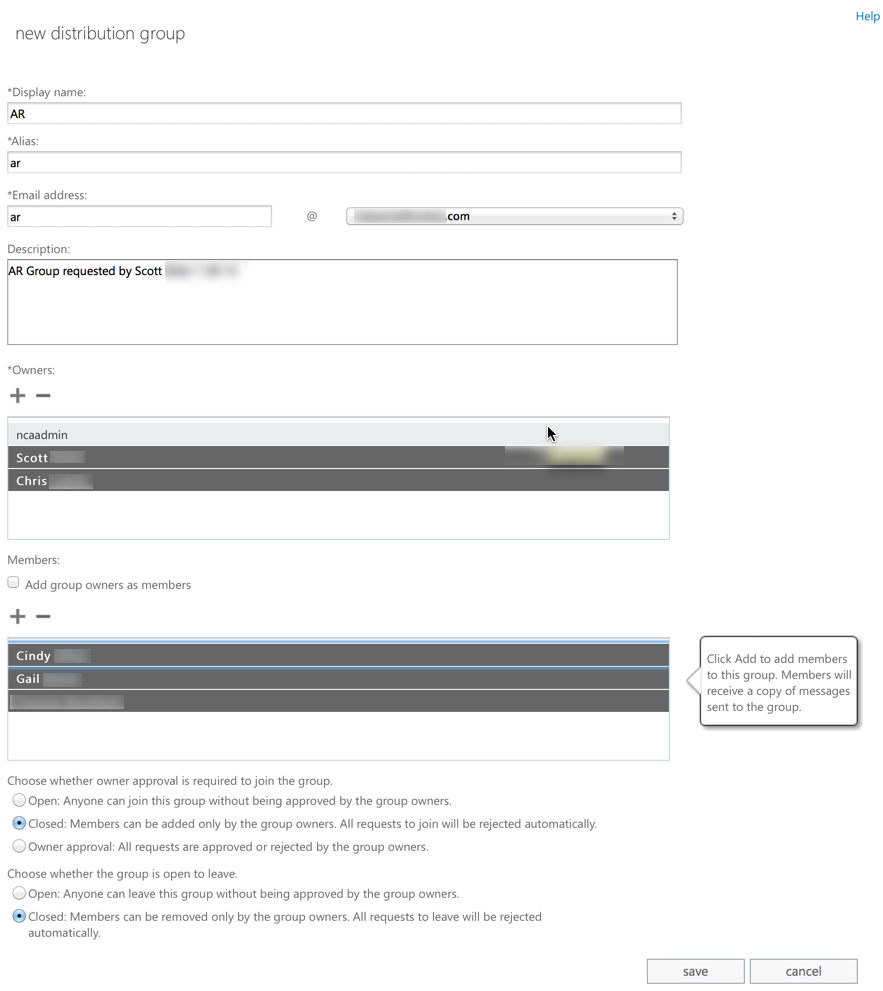
3) Enter the display name for the Distribution Group, the alias which is generally the first part of the email address. Enter the first portion of the email address and click the drop down to select your external email domain of choice.
4) Fill out the Distribution Group members
5) You can optionally fill out group owners as well as specify the characteristics for joining and leaving a group. I generally select closed as that mimics the legacy Exchange behavior that people are accustomed to.
6) click Save
Note: If you get an error that the display name already exists then you likely already have an account in AD by the same name, and you will need to delete it once you confirm its not needed by anyone for authentication purposes.
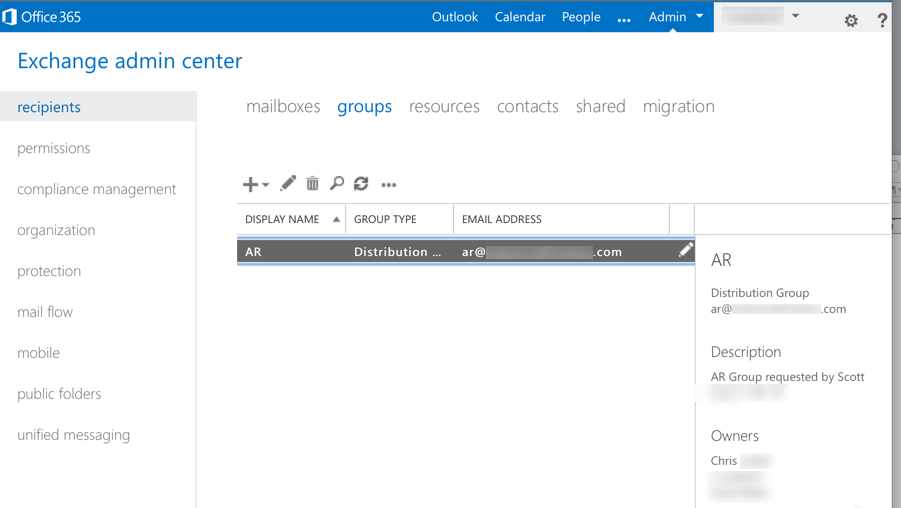
You will now see the new Office 365 Distribution Group has been created. If you need to make changes to a Distribution Group just click the ‘edit’ Pencil icon ![]() .
.
By default distribution groups will not receive email from outside the organization. Here are instructions to make it so the distribution group gets outside email.